Creating Vibrant Lithophanes: A Step-by-Step Guide
Written on
Chapter 1: Introduction to Colorful Lithophanes
In our previous guides, "How to Create Lithophanes with 3D Printing" and "How to Create a Lithophane Housing with Integrated Lighting," we explored the basics of lithophane creation. This segment delves into an innovative method to add vibrant colors to your lithophanes.
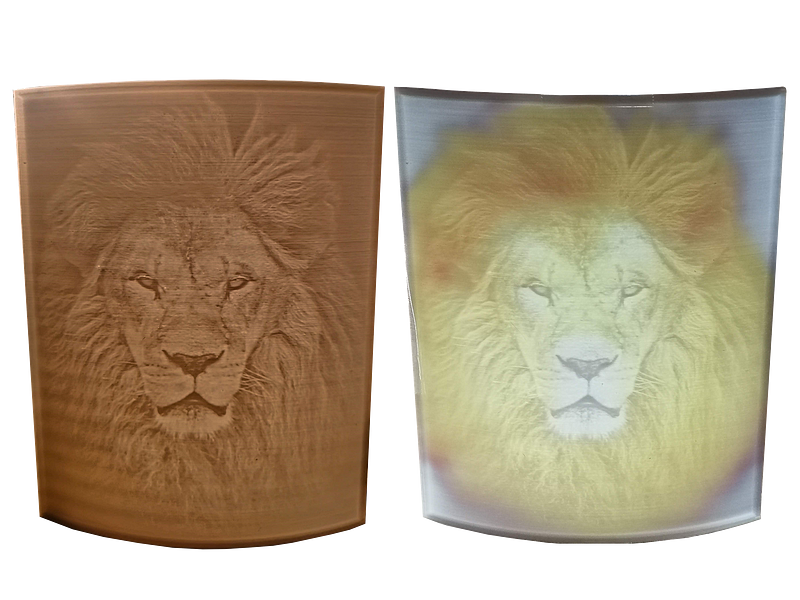
While traditional lithophanes are crafted from white plastic, producing images that are strictly black and white through the interplay of light and shadow, there is a straightforward technique to infuse color into these creations. This can be accomplished using a standard color printer.
Don't be misled into thinking that simply printing an image and affixing it to the front of your white plastic piece is the solution. That's not how this works, and it would not enhance your lithophane in the intended way. A true colored lithophane is achieved by printing the colors of the converted image from a specific website and applying it to the back of the lithophane. The original image remains unaltered; it’s the light passing through that brings the color to life.
Section 1.1: Preparing Your Image
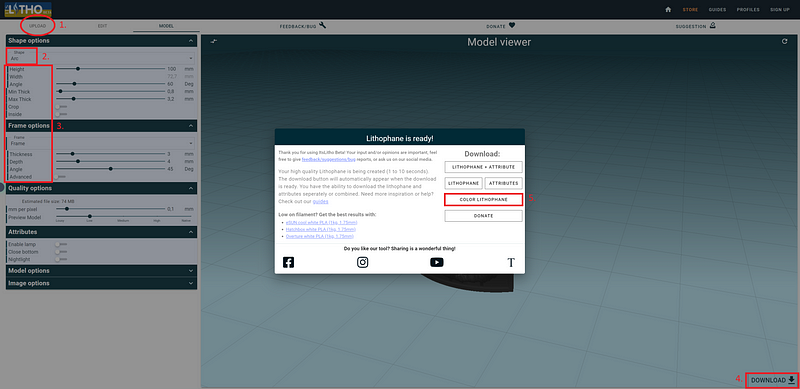
To begin, you'll need to use a lithophane maker, such as:
ItsLitho
Convert your image into a lithophane model using the ItsLitho tool.
Visit:
tool.itslitho.com
Creating the image involves just a few simple steps:
- Upload your image at the top left corner.
- Click on the "Model" tab and select the shape "Arc" if your lithophane is curved.
- Enter the precise dimensions, including height and width.
- Download your model.
- In the subsequent window, select "Color Lithophane."
Section 1.2: Printing and Viewing Your Creation
Once your image has been adjusted for the lithophane, it should exhibit enhanced colors that will be visible when illuminated. You can print the image and affix it to the rear of the lithophane using a standard Pritt pen or, for initial trials, an adhesive strip.
Afterward, hold your creation up to a light source to admire your artwork.
Chapter 2: Video Tutorials for Further Guidance
To enhance your understanding, here are two informative video tutorials:
The first video titled "How To Make Amazing Color Lithophanes Using The Bambu Lab CMYK Bundle!" provides an in-depth look at creating stunning lithophanes.
The second video, "Creating Color Lithophanes the Easy Way using BambuLab P1S," simplifies the process for beginners and offers practical tips.
I hope this guide has been enlightening and inspires you to craft your own colorful lithophanes. Should you have any inquiries regarding this topic, don't hesitate to reach out.