Integrating Font Awesome Icons into Your NextJS App Router
Written on
Chapter 1: Introduction to Font Awesome
Font Awesome is a widely-used icon library offering a rich selection of scalable vector icons. These icons are ideal for enriching the user interface of your Next.js application, providing visual clarity and enhancing the overall user experience. The icons are lightweight and can be easily tailored to fit your app's design.
Section 1.1: Incorporating Font Awesome with App Router
When utilizing the App Router in Next.js, it's best to include Font Awesome styles in your layout.js file rather than in _document.js. By doing this, you ensure that the icons are accessible across all pages of your application, as layout.js wraps all routes. Including them in _document.js could lead to unnecessary styles being loaded on pages that do not require them.
Section 1.2: Installation Steps
After setting up your Next.js project with App Router, you'll need to install a couple of node packages:
npm install --save @fortawesome/react-fontawesome@latest
npm install --save @fortawesome/free-solid-svg-icons
Following the installation, add the subsequent code at the top of the layout.js component of the desired route:
import "@fortawesome/fontawesome-svg-core/styles.css";
import { config } from "@fortawesome/fontawesome-svg-core";
config.autoAddCss = false;
This code snippet optimizes the integration of Font Awesome icons with your Next.js project using the App Router. It first imports the essential core CSS styles for the icons and then imports a configuration object to modify Font Awesome's behavior. By setting autoAddCss to false, you prevent the automatic inclusion of CSS styles by Font Awesome, allowing you greater control over when these styles are loaded, ensuring they are only included in your layout.js for the relevant pages. This approach keeps your project efficient and minimizes unnecessary style loading.
Chapter 2: Adding Icons to Components
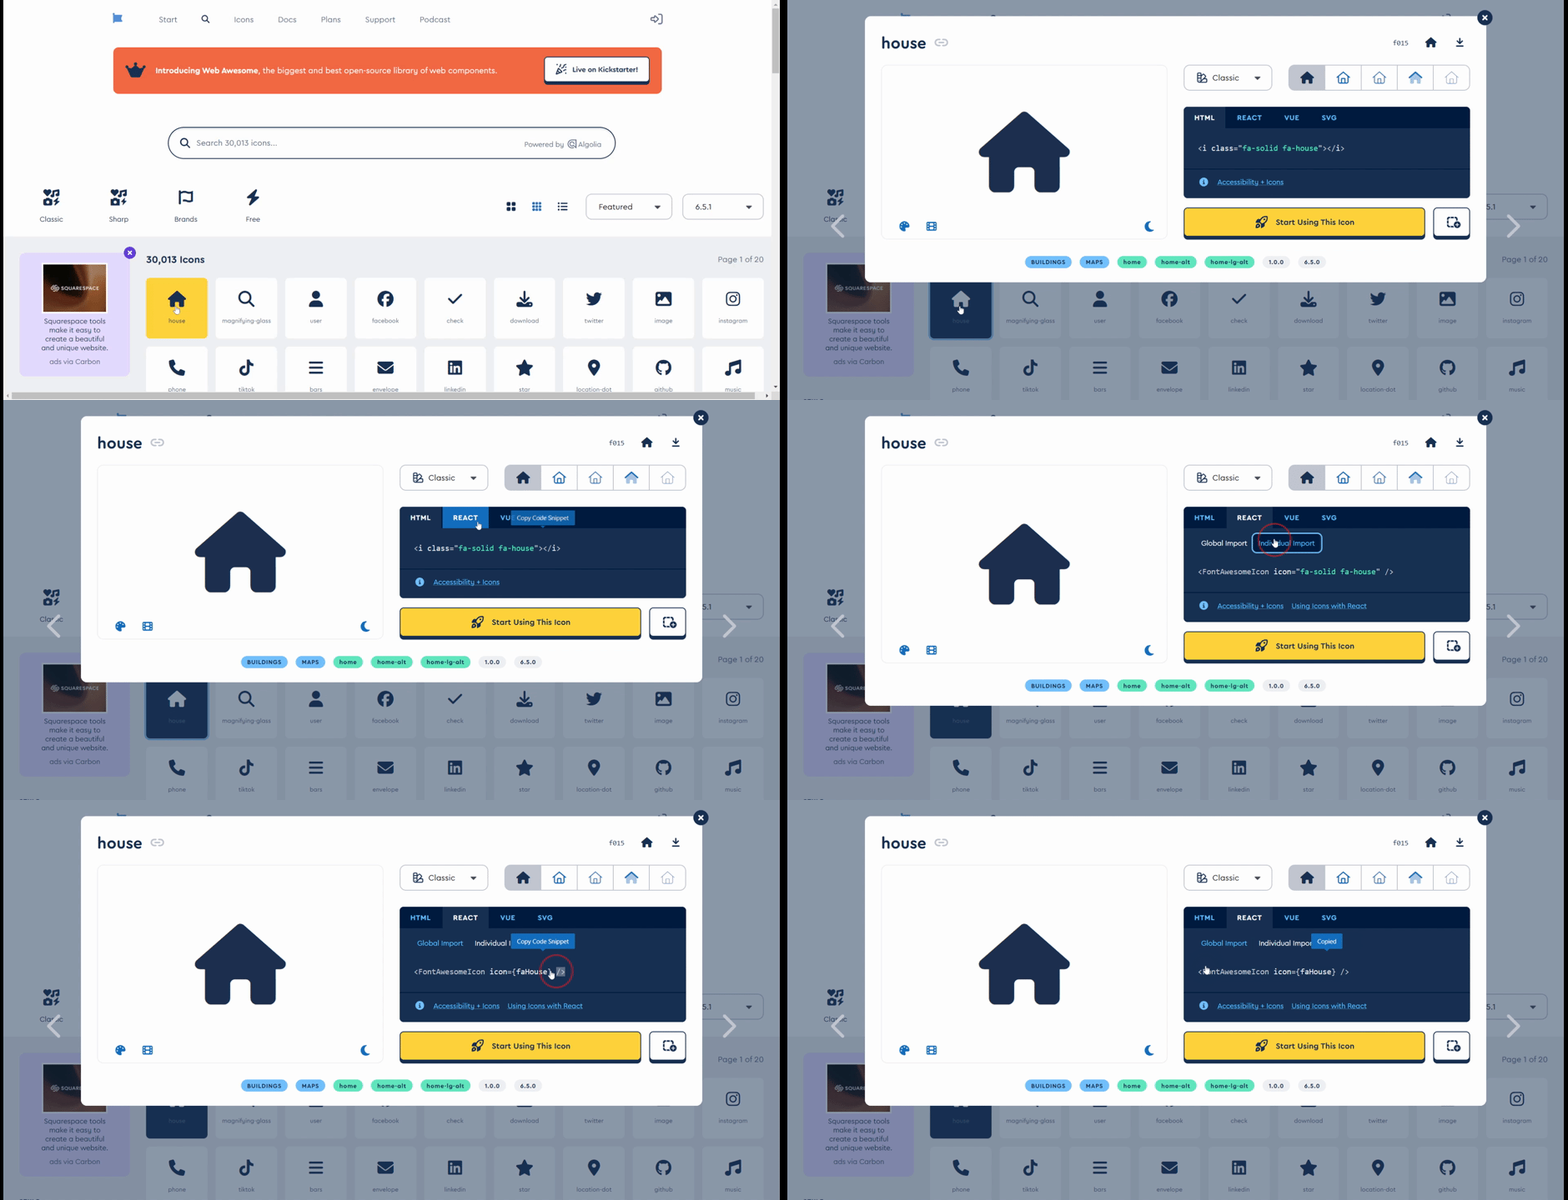
To send only the necessary icons to your users, reducing the overall data size, you can select icons directly from the Font Awesome website:

To utilize an icon, include the following code in your component to specify which icons you want to use:
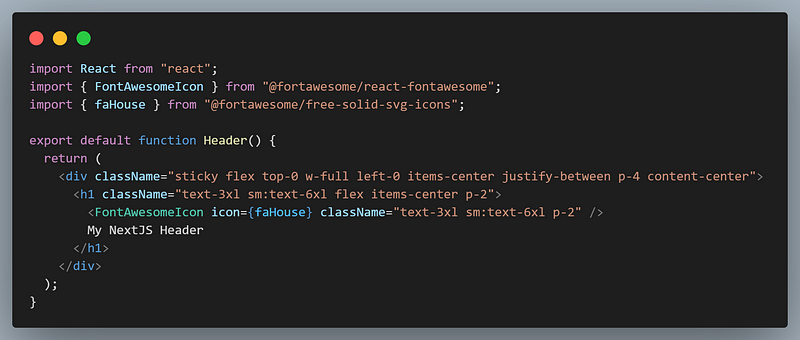
import { FontAwesomeIcon } from "@fortawesome/react-fontawesome";
import { faHouse } from "@fortawesome/free-solid-svg-icons";
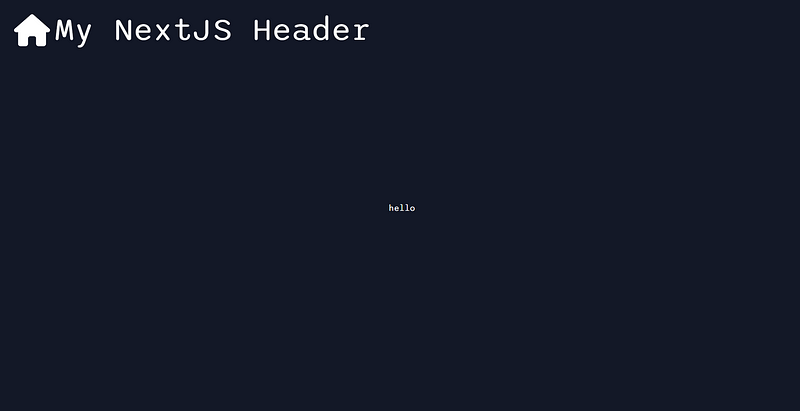
Then, within your JSX, reference the icon using the code obtained from the Font Awesome website. This can be effectively combined with CSS styles, such as TailwindCSS, as demonstrated in the example below with the Header.js component.


By thoughtfully incorporating styles in your layout and selectively importing icons, you can ensure a visually appealing user experience while maintaining an efficient and streamlined codebase. This strategy empowers your Next.js application to leverage Font Awesome's capabilities, effectively conveying information and enhancing the overall user journey.
This video titled "Using Fontawesome v6 icons in NextJS" provides a comprehensive guide on how to effectively implement Font Awesome icons in your Next.js project.
The second video, "How to use FontAwesome in Next js 14 with app directory?" offers insights into utilizing Font Awesome within the app directory structure of Next.js 14.